


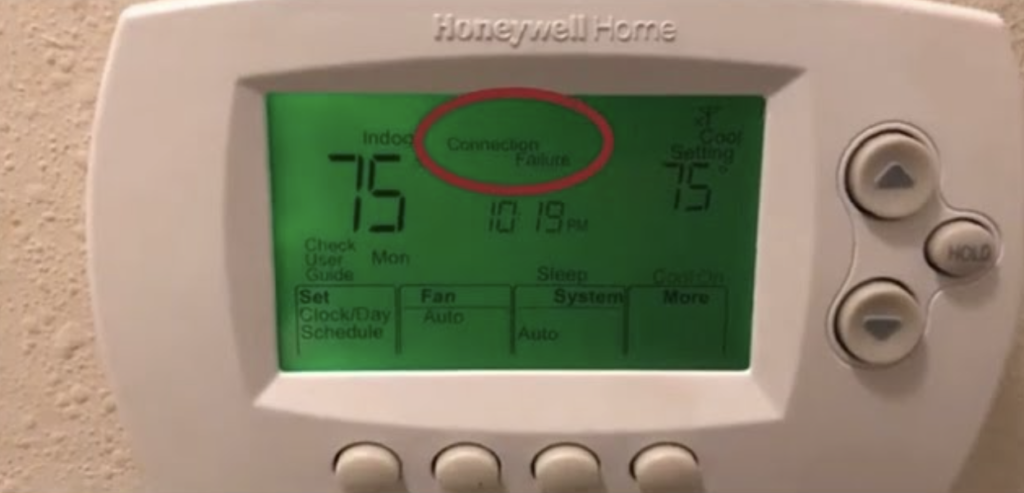
Honeywell Thermostat connection failure [Solved].
A Honeywell thermostat connection failure typically refers to an issue where a Honeywell thermostat is unable to establish a connection or communicate with the heating, ventilation, and air conditioning (HVAC) system it is controlling.
These thermostats are designed to regulate the temperature in your home or building by sending signals to your HVAC equipment.
At a glance: Honeywell Thermostat connection failure due to hermostat Not in Router Range,Thermostat Can’t Detect Wi-Fi Network,Wi-Fi SSID hidden,Wi-Fi Disabled On Your Thermostat,Wi-Fi details have changed or Router needs a Reboot.
Related Post>>>>HoneyWell Thermostat Blank Screen.
Why honeywell thermostat connection fails.
1.Thermostat Not in Router Range.
Is your Honeywell thermostat experiencing connection failures, leaving you puzzled and frustrated? One often-overlooked culprit for such issues is the thermostat’s location concerning your router’s signal range.
In this post, we’ll explore why your Honeywell thermostat might be struggling with its connection and offer solutions to address this common problem.
Distance Matters.
Imagine your Wi-Fi signal as a ripple in a pond, with your router at its center. The farther you move from the router, the weaker the signal becomes.
Your thermostat, situated at the edge of this signal range, is susceptible to connectivity issues due to minor disruptions.
Even seemingly harmless obstacles like people passing by or interference from other smart devices and microwaves can disrupt the connection.
Troubleshooting Steps.
Here are steps you can take to diagnose and potentially resolve the issue:
- Reposition Your Router: Try relocating your Wi-Fi router to a position closer to the thermostat. This simple adjustment can make a significant difference in signal strength.
- Router Upgrade: If moving the router isn’t feasible, consider upgrading to a router with a broader signal range. Newer routers often have improved coverage and advanced features.
- Wi-Fi Booster: Another option is to invest in a Wi-Fi booster, also known as a range extender. These devices amplify your existing Wi-Fi signal, effectively eliminating dead zones in your home.
- Mesh Network: A more comprehensive solution is implementing a mesh network. Mesh systems consist of multiple access points placed strategically throughout your home, ensuring consistent and strong coverage everywhere.
- App and Device Updates: When attempting to connect your thermostat to your smartphone, ensure that both the app and your device’s software are up to date. Manufacturers often release updates to improve compatibility and performance.
- Optimal Placement: When connecting your thermostat, hold your smartphone closer to it. This proximity can help establish a more stable and robust connection.
2.Thermostat Can’t Detect Wi-Fi Network.
Is your Honeywell smart thermostat struggling to detect your Wi-Fi network? This can be a frustrating issue, but we’re here to guide you through the steps to diagnose and resolve it.
In some cases, the problem may be as simple as ensuring your router is powered on, while in others, it might require adjusting your router’s settings or performing a soft restart of your thermostat.
Check Your Router.
Begin by confirming that your router is powered on and functioning. Sometimes, after returning from a vacation or a power outage, we forget to plug it back in.
This oversight can lead to connectivity issues with your thermostat.
Also read>>>>honeywell ac not working.
2.4GHz Band Compatibility.
If your router is indeed operational, it’s essential to check its frequency bands. Some routers offer both 2.4GHz and 5GHz Wi-Fi bands.
Many smart home devices, including thermostats, are designed to work with the 2.4GHz band. If your router is set to use the 5GHz band exclusively, your thermostat may not be able to connect.
Troubleshooting Steps.
Temporarily disable the 5GHz band during the thermostat setup process.
Configure your router to broadcast on both 2.4GHz and 5GHz bands if your router supports this feature. This ensures compatibility with a broader range of devices.
Soft-Restart Your Thermostat
If the issue persists, try performing a soft restart of your thermostat. This can be done by disconnecting it from the main power source or removing one of its batteries.
Restarting the thermostat can refresh its network settings and improve the connection, especially if the network details remain unchanged.
Check for VPNs
Sometimes, virtual private networks (VPNs) or spoofers running on your network can interfere with your thermostat’s ability to connect to your Wi-Fi.
Before attempting the connection again, make sure to disable any VPNs or spoofers, or force close their respective applications.
3.Wi-Fi SSID hidden.
Are you facing connectivity issues with your Honeywell thermostat, and suspect that the hidden Wi-Fi SSID might be the culprit?
In some cases, when your Wi-Fi network’s name is not broadcasted publicly and is hidden from other devices, it can lead to difficulties in connecting your thermostat.
Don’t worry; we have solutions to help you break down these digital barriers and get your thermostat connected seamlessly.
Also read>>>>Honeywell Thermostat cool on blinking.
Hidden Wi-Fi SSID: The Challenge.
A hidden Wi-Fi SSID means that your router does not broadcast the network name for security or privacy reasons.
While this is a prudent measure, it can create problems when connecting devices like your Honeywell thermostat.
Solution 1: Adjust Router Settings.
The first step to resolving this issue is to change your router’s settings to allow the SSID to be broadcasted. To do this:
- Access your router’s settings page through a web browser. You can usually find this information in the router’s manual or by searching online for your router’s default IP address.
- Log in to your router’s settings page with the administrator credentials.
- Look for the wireless settings section, where you can find options related to your SSID. There should be an option to enable SSID broadcasting. Make sure to save your changes.
- Once you’ve enabled SSID broadcasting, your Wi-Fi network name should be visible to all devices, including your thermostat.
Also read>>>Honeywell Thermostat Clicking Repeatedly.
Solution 2: Manually Input Wi-Fi Name in Thermostat.
If you prefer not to change your router settings or if your network requires SSID hiding for security reasons, you can manually input the Wi-Fi network name into your Honeywell thermostat. Here’s how:
- Access your thermostat’s settings menu. Refer to your thermostat’s manual for instructions on how to do this, as the process may vary depending on the model.
- Look for the option to input the Wi-Fi network name manually. It may be labeled as “Other” or “Manual Entry.”
- Carefully type in the exact name of your Wi-Fi network. Pay close attention to uppercase and lowercase letters, as well as any special characters. Any variation from the actual SSID can result in connection issues.
By manually entering the network name, you ensure that your thermostat can find and connect to your hidden Wi-Fi SSID accurately.
4.Wi-Fi Disabled On Your Thermostat.
Are you experiencing difficulties connecting your Honeywell thermostat to your Wi-Fi network?
One possible reason for this issue could be that Wi-Fi is disabled on your thermostat, especially on recent models like the T10 Pro.
In this guide, we’ll walk you through the steps to enable Wi-Fi on your thermostat and get your connection up and running smoothly.
Also read>>>>Rheem Air Conditioner Problems.
The Hidden Setting: Wi-Fi Disabled.
Some Honeywell thermostat models, including the T10 Pro, offer the option to disable Wi-Fi connectivity.
This feature is designed to allow users to control when their thermostat connects to the network. However, if your thermostat’s Wi-Fi is currently disabled, it can lead to connection problems.
Enabling Wi-Fi on Your Thermostat.
To resolve this issue, follow these simple steps to enable Wi-Fi on your Honeywell thermostat:
- Activate the Display: Start by waking up the screen on your thermostat. You can do this by touching any part of the display.
- Access the Menu: Next, tap on the menu button represented by three horizontal lines, often referred to as the “sandwich” menu button. You’ll typically find this at the bottom of the screen.
- Navigate to Wi-Fi: Scroll down through the menu options until you find “Wi-Fi.” Select this option.
- Enable Wi-Fi: Within the Wi-Fi settings, you should see a toggle switch labeled “Enable Wi-Fi.” Make sure this switch is set to the “On” position.
By following these steps, you ensure that Wi-Fi is enabled on your thermostat, allowing it to connect to your network.
Troubleshooting Tip: Check for Updates
While you’re in the Wi-Fi settings, it’s a good idea to check if there are any software or firmware updates available for your thermostat.
Manufacturers often release updates to improve performance and connectivity.
5.Wi-Fi details have changed.
Have you recently altered your Wi-Fi network details, such as the network name or password, and now find your Honeywell thermostat unable to connect?
This can be a common cause of connection problems, but fear not, as we have a straightforward solution to help you get your thermostat back online.
Changing Wi-Fi Network Details: The Issue
When you modify your Wi-Fi network’s name or password, your thermostat might not recognize the updated network properties. This mismatch can result in connectivity issues.
Reconnecting to Your Wi-Fi Network.
To resolve this problem, you need to reconnect your thermostat to the network, just as you did during the initial setup. Follow these steps:
- Find the Network: Begin by searching for your Wi-Fi network from your thermostat’s menu.
- Input the Password: Once you locate your network, enter the new password that corresponds to your updated network details.
- Pair the Devices: Follow the prompts on your thermostat’s screen to complete the pairing process. This typically involves confirming the connection.
Disconnect and Reconnect (Optional)
If you find that your thermostat is still having trouble connecting, you can try disconnecting it from your home Wi-Fi network and then reconnecting it. Here’s how:
- Reset Wi-Fi Settings: On your thermostat, you can reset the Wi-Fi settings. Refer to your thermostat’s manual for instructions on how to do this, as the process may vary by model.
- Switch Networks: For newer models like the T10 Pro and T9, you can simply switch to a different network or forget the old one from your thermostat’s settings.
- Remove from Honeywell Home App: If you’ve previously connected your thermostat to the Honeywell Home app, you should also remove it from the app. Follow these steps:
- Open the Honeywell Home app.
- Choose your device (thermostat).
- Tap the gear settings icon to access the thermostat configuration.
- Press “Delete Thermostat.”
- Reconfigure in the App: After removing the thermostat from the app, follow the app’s instructions to reconnect your device. This usually involves setting up the thermostat as a new device in the app.
By following these steps, you can successfully reconnect your thermostat to your updated Wi-Fi network and regain control over your HVAC system.
6.Router needs a Reboot.
Are you facing persistent issues with your Honeywell thermostat’s Wi-Fi connection, and you’ve already explored the more common troubleshooting steps?
Sometimes, the culprit for connectivity problems might lie with your router itself.
In this guide, we’ll delve into the less common but potentially crucial reason for thermostat disconnection: your router needing a reboot.
The Overlooked Router Factor.
Your router plays a pivotal role in connecting your Honeywell thermostat to your Wi-Fi network.
Occasionally, problems may arise due to your router requiring a reboot. Consider the following scenarios:
- Power Surge: Has there been a power surge in your home recently? Power fluctuations can disrupt the normal operation of electronic devices, including routers.
- Automatic Updates: Routers often receive automatic firmware updates from the manufacturer or your internet service provider. These updates are crucial for security and performance but can sometimes lead to connectivity issues.
- Firmware Bugs: In rare cases, firmware bugs or glitches in the router’s software can affect its functionality.
If any of these possibilities resonate with your situation, it may be time to reboot your router.
Rebooting Your Router.
Rebooting your router is a straightforward process that can help resolve connectivity issues. Here are the steps to do it:
- Power Off and On: The easiest way to reboot your router is to turn it off and then back on again. To do this, locate the power button on your router (usually on the back or side) and switch it off. Wait for about 30 seconds, and then turn it back on. Give the router a few minutes to fully restart.
- Factory Reset (Caution): If a simple reboot doesn’t work, you can perform a factory reset, but use this option with caution. A factory reset will erase all your router settings, including the Wi-Fi name and password you’ve set up. To factory reset your router, locate the reset button (usually a small hole) on the router and press and hold it for an extended period, typically 10-15 seconds. Be sure to consult your router’s manual for specific reset instructions.
- Reconfigure Wi-Fi: After rebooting or resetting your router, you’ll need to reconfigure the Wi-Fi settings, including the network name and password. Refer to your router’s manual for guidance on how to set up your Wi-Fi network again.
By rebooting your router, you can refresh its functionality and potentially resolve the Honeywell thermostat connection failure. Ensure that you follow the appropriate steps carefully and refer to your router’s documentation for model-specific instructions.
7.Network Interference.
Are you grappling with persistent connection problems on your Honeywell thermostat? One often-overlooked factor that can lead to connection failure is network interference.
In this guide, we’ll explore how a crowded network and various sources of wireless interference can impact your thermostat’s connectivity and provide solutions to mitigate these issues.
The Challenge of a Crowded Network.
Modern households are teeming with smart devices, from smartphones and tablets to smart TVs, speakers, and more. Many of these devices rely on the 2.4GHz band for Wi-Fi connectivity.
When multiple devices compete for bandwidth on this already congested network, it can slow down your router’s signal and affect your thermostat’s ability to connect.
Sources of Wireless Interference.
In addition to device congestion, other wireless sources can interfere with your Wi-Fi network.
Bluetooth devices, for example, can occupy the same frequency spectrum as your Wi-Fi, potentially causing conflicts. Even seemingly unrelated appliances like microwave ovens can emit signals that disrupt Wi-Fi connectivity.
Troubleshooting Network Interference.
To address network interference and improve your thermostat’s connectivity, follow these steps:
- Prioritize Network Needs: Before attempting to connect your thermostat, prioritize your network’s bandwidth by disconnecting or turning off devices that are not currently in use. This reduces the strain on your router and enhances the available bandwidth for your thermostat.
- Check for Bluetooth Devices: Identify and disconnect Bluetooth devices that may be actively using the same frequency as your Wi-Fi network. Temporarily turning off Bluetooth devices when connecting your thermostat can help mitigate interference.
- Microwave Ovens: Microwave ovens can emit strong electromagnetic interference when in use. Try to avoid using the microwave while configuring or connecting your thermostat. Additionally, ensure that your router is positioned away from the microwave to minimize interference.
- Wi-Fi Channel Selection: Some routers allow you to manually select the Wi-Fi channel. Experiment with different channels to find the one with the least interference in your area. This can help optimize your Wi-Fi signal.
- Wi-Fi Range Extender: Consider using a Wi-Fi range extender or mesh network to expand your network coverage. These devices can help distribute the signal more evenly throughout your home, reducing congestion in specific areas.
By addressing network interference and optimizing your network environment, you can significantly enhance the connectivity process for your Honeywell thermostat.
Remember that a less congested and interference-free network ensures reliable and consistent communication with your thermostat, allowing you to maintain control over your HVAC system.
Conclusion.
Troubleshooting Honeywell Thermostat connection failure can sometimes become very tedious.
If you have a strong Wi-Fi signal and you know how to access the router’s settings, you should be fine for the most part.