Heat pump not working in cold weather [Solved].
Heat pump not working in cold weather can be a source of frustration, especially when you rely on it for year-round comfort. Whether it’s the dead of winter or the peak of summer, Heat pump not working in cold weather can disrupt your home’s climate control.
At a glance: Heat pump not working in cold weather can be caused by Thermostat issues,Power Supply,Air filter,Thermostat Batteries or Ductwork issues.
In this comprehensive guide, we will explore the common issues that lead to a Heat pump not working in cold weather and provide practical solutions to get your system back in action.
From thermostat misconfigurations and power supply problems to issues with refrigerant levels and outdoor unit malfunctions, we will walk you through a step-by-step troubleshooting process.
By the end of this article, you’ll have the knowledge to identify the root cause of your heat pump troubles and the confidence to implement the necessary fixes or seek professional assistance for a swift resolution.
Don’t let a malfunctioning heat pump compromise your comfort – let’s dive into the solutions and restore your HVAC system to optimal performance.
Also read>>>>Why Won’t My Furnace Turn On.
Heat pump not working in cold weather.
1.Thermostat.
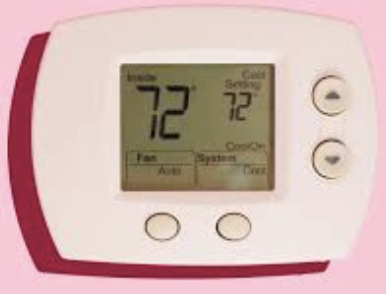
When troubleshooting a non-functioning heat pump, the thermostat serves as a critical starting point. Begin by verifying if the thermostat settings align with your comfort needs. Check not only the temperature but also the operational mode to ensure it corresponds to the current season—select ‘heating’ during winter and ‘cooling’ for summer.
How to Fix:
To address thermostat-related issues, follow these detailed steps:
–Temperature Settings
Access your thermostat settings and confirm the desired temperature. Ensure it is set to a level that should trigger the heat pump to engage.
–Mode Adjustment
Check the operational mode of the thermostat. For winter, switch to the ‘heating’ mode; for summer, select ‘cooling.’ This ensures the heat pump is attempting to provide the appropriate climate control.
–Battery Check
Some thermostats operate on batteries. Confirm if your thermostat requires battery replacement and, if needed, install fresh batteries.
–Programming Review
If your thermostat has a programmed schedule, review and update it. Incorrect programming might result in the heat pump not activating when needed.
Also read: Heat Pump Not Working.
–Wiring Inspection
Carefully inspect the thermostat wiring for any loose connections or damage. If issues are found, consider consulting a professional technician for repairs.
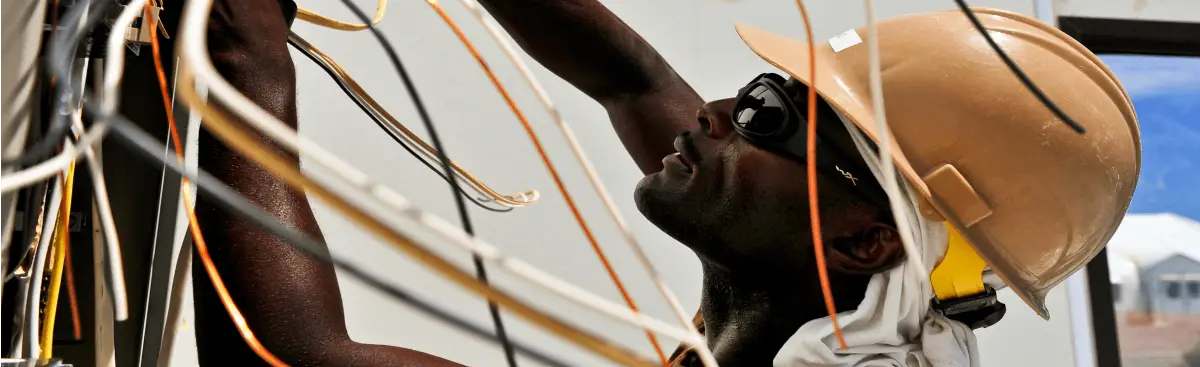
2.Power Supply.
A lack of power is a common culprit when your heat pump refuses to function. It’s crucial to confirm that the system is receiving the necessary electrical supply.
How to Fix:
To address power supply issues, follow these detailed steps:
-Circuit Breaker Inspection
Locate the circuit breaker panel in your home. Identify the breaker corresponding to the heat pump and check if it’s in the “on” position. If it’s tripped, reset it by firmly moving it to the “off” position and then back to “on.”
-GFCI Outlets
Some heat pumps are connected to Ground Fault Circuit Interrupter (GFCI) outlets. Check for any tripped GFCI outlets in the vicinity and reset them if needed. This is particularly crucial for outdoor units.
–Power Switch on the Heat Pump
Locate the power switch on the heat pump unit itself. Ensure it is in the “on” position. Over time, vibrations or accidental bumps can shift the switch to the “off” position, disrupting the power supply.
–Electrical Connections
Inspect the electrical connections to the heat pump for any signs of damage or loose wires. If any issues are identified, it’s advisable to seek assistance from a qualified technician.
–Voltage Check
If you have a multimeter, perform a voltage check at the power supply to the heat pump. This can help determine if there is an electrical issue upstream.
Also read: Furnace Ignitor Lights But No Flame.
3.Air Filter.

The air filter plays a crucial role in the efficiency of your heat pump. Over time, it can become clogged with dust and debris, leading to restricted airflow and diminished performance.
How to Fix:
To address air filter-related issues, follow these detailed steps:
–Locate the Air Filter
Find the location of the air filter. It is typically located in the return air duct, in the air handler, or within the indoor unit of the heat pump.
–Turn Off the Heat Pump
Before inspecting or replacing the air filter, turn off the heat pump. This ensures safety and prevents further debris from circulating.
–Inspect the Air Filter
Carefully remove the air filter and inspect it for dirt, dust, and debris. Hold it up to the light; if you can’t see light through it, the filter is likely clogged.
–Filter Type and Size
Note the type and size of the air filter. This information is often printed on the frame. Purchase a replacement filter that matches these specifications.
–Replacement
If the filter is dirty or clogged, replace it with a new one. Follow the manufacturer’s instructions for proper installation.
–Regular Maintenance
Establish a regular schedule for air filter maintenance. Depending on factors like the type of filter and household conditions, it’s generally recommended to replace or clean the filter every 1-3 months.
–Upgrading Filters
Consider upgrading to a higher efficiency filter, especially if you have allergies or if the environment demands better air quality. However, ensure it is compatible with your heat pump system.
Also read>>>>Furnace Turns On But No Heat.
4.Thermostat Batteries.

In some thermostat models, low or depleted batteries can lead to malfunctions, disrupting the proper operation of your heat pump.
How to Fix:
To address thermostat battery-related issues, follow these detailed steps:
–Locate the Thermostat Battery Compartment
Identify the battery compartment on your thermostat. It is often situated on the back or, in some cases, within the front cover.
–Turn Off the Thermostat
Before replacing the batteries, turn off the thermostat to prevent any potential issues during the replacement process.
–Battery Type
Check the thermostat manual or inspect the old batteries to determine the correct battery type required. Common types include AA or AAA alkaline batteries.
–Remove Old Batteries
Open the battery compartment and carefully remove the old batteries. Pay attention to the correct orientation (positive and negative terminals) of the batteries.
–Clean the Battery Contacts
Use a soft, dry cloth to clean the battery contacts within the compartment. This ensures a good connection with the new batteries.
–Insert New Batteries
Insert the new batteries into the compartment, following the correct polarity. Most thermostats indicate the proper orientation inside the battery compartment.
–Turn On the Thermostat
After inserting the new batteries, turn on the thermostat and set it to your desired settings. Check if the display is functioning correctly.
–Battery Replacement Schedule
Establish a routine for checking and replacing thermostat batteries, typically once a year or as recommended by the thermostat manufacturer.
Also read:Why is my Electric Furnace Blowing Cold Air.
5.Ductwork Inspection.
The efficiency of your heat pump is heavily reliant on unobstructed airflow through the ductwork. Leaks or blockages in this system can significantly impact its performance.
How to Fix:
To address ductwork-related issues, follow these detailed steps:
–Locate Access Points
Identify accessible points in your home where you can inspect the ductwork. Common access points include vents, registers, and, if applicable, the attic or crawl spaces.
–Turn Off the Heat Pump
Before inspecting the ductwork, turn off the heat pump to ensure safety during the process.
–Visual Inspection
Carefully examine the visible sections of ductwork for any visible signs of damage, such as holes, gaps, or disconnected joints. Use a flashlight to aid in the inspection.
–Seal Leaks
If you identify leaks, use duct tape or mastic sealant to patch small holes. For larger gaps or disconnected joints, consider consulting a professional technician for a more comprehensive repair.
–Clear Obstructions
Remove any obstructions within the ductwork, such as debris, dust, or even pests. A vacuum cleaner with a long hose attachment can be useful for this task.
–Inspect Vents and Registers
Check that vents and registers throughout your home are open and unobstructed. Ensure that furniture, curtains, or other items are not blocking the airflow.
–Consider Professional Duct Cleaning
If you notice a significant buildup of dust or debris within the ducts, consider scheduling a professional duct cleaning service. This can improve overall system efficiency.
–Ductwork Insulation
Verify that ductwork insulation is intact and in good condition. Damaged insulation can contribute to temperature loss and reduced efficiency.
Also read>>>Furnace Leaking Water When AC Is Off.
Frequently Asked Questions (FAQs)
Why is my Heat pump not working in cold weather?
Check the thermostat settings first. Ensure it is set to the correct temperature and mode (heating for winter, cooling for summer). Verify the power supply by checking the circuit breaker and the power switch on the heat pump. If the issue persists, proceed with inspecting the air filter, outdoor unit, and other components following the troubleshooting guide.
How do I know if the air filter needs replacement?
Regularly inspect the air filter by removing it and holding it up to the light. If you can’t see light through it, the filter is likely clogged and needs replacement. It’s recommended to replace the air filter every 1-3 months, depending on factors like filter type and household conditions. A clean filter ensures optimal airflow and system efficiency.
What should I do if the thermostat display is blank or unresponsive?
First, check the thermostat batteries. If applicable, replace them with fresh ones. Ensure correct battery orientation, clean the battery contacts, and turn the thermostat back on. If the display remains blank, proceed with checking the power supply, thermostat wiring, and other components. If issues persist, consult a professional technician for a thorough inspection.
How can I inspect the ductwork for issues?
Begin by locating accessible points in your home, such as vents and registers, for a visual inspection. Turn off the heat pump for safety. Look for visible signs of damage in the ductwork, seal any leaks with duct tape or sealant, and clear obstructions. Ensure vents and registers are open and unobstructed. For larger issues or extensive ductwork problems, it’s advisable to seek assistance from a professional HVAC technician.
Also read>>>Heat Pump Freezing Up.
Conclusion
Troubleshooting a Heat pump involves a systematic approach. From checking the thermostat and power supply to inspecting the air filter and ductwork, these detailed steps empower homeowners to diagnose and often resolve common issues. Regular maintenance, timely replacements, and professional assistance ensure optimal performance, keeping your HVAC system running smoothly.
Learn more: